How to Make Spooky Halloween Cakes Kids Will Love
The first time I saw a Spooky & Easy Halloween Cake at a neighborhood party, it set the tone for every October since. Those bright colors and silly faces made memories that still pop up whenever fall rolls in. The scent of sugary frosting in the kitchen takes me right back to that rush of excitement—mixing and decorating with family, eager to show off our lopsided creations.
If you want to create those same warm memories, this Spooky & Easy Halloween Cake is your ticket. You don’t need fancy tools or expert skills. Just a few simple ingredients and a bit of imagination. For more ideas to savor the flavors of fall and create new memories, check out the Hearty Loaded Chicken and Potato Casserole recipe that’s perfect for a cozy night in.
Why You’ll Love This Spooky Halloween Cake
If you’re looking to spark big smiles, laughter, and maybe even a few delicious shivers, this Spooky Halloween Cake hits the mark. It’s more than just dessert—it’s a centerpiece for your Halloween table and an excuse to get creative in the kitchen. Whether you’re baking with kids, friends, or for a festive party, this cake turns every gathering into something memorable.
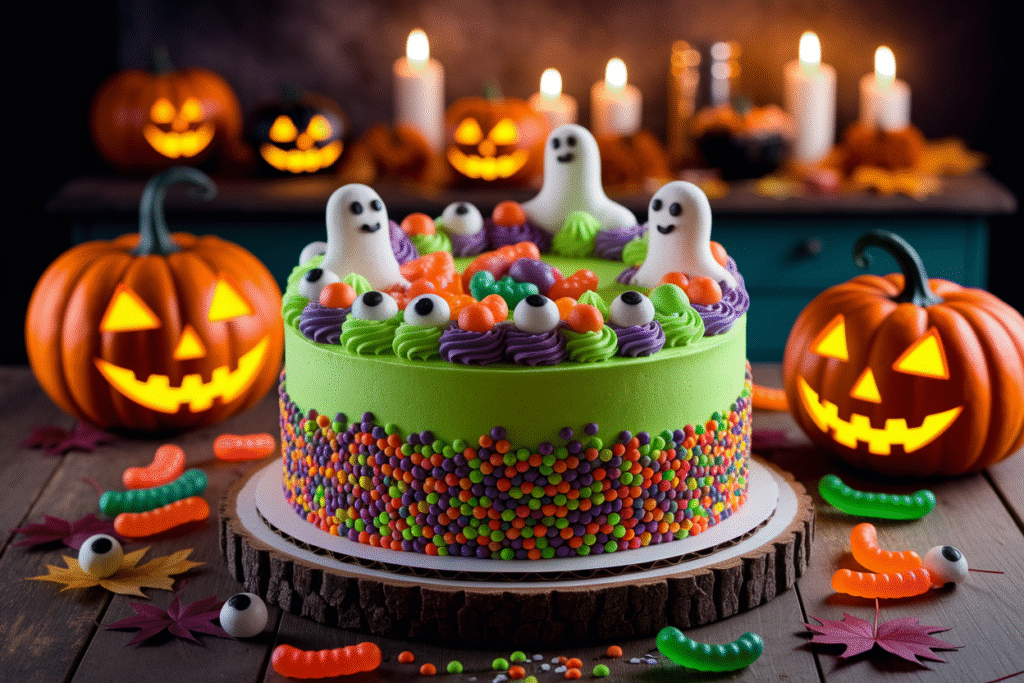
Simple and Stress-Free
Baking a Spooky Halloween Cake doesn’t have to feel like a complicated project. This recipe is built for ease, from start to finish. You don’t need gourmet skills or expensive bakeware. Grab a mixing bowl, a box of cake mix, and your favorite Halloween sprinkles. Even if your piping skills are limited to “blob and swirl,” your cake will still turn out perfectly festive.
- No fancy equipment needed.
- Minimal prep and cleanup.
- Adaptable for boxed or homemade cake mixes.
It’s Fun for All Ages
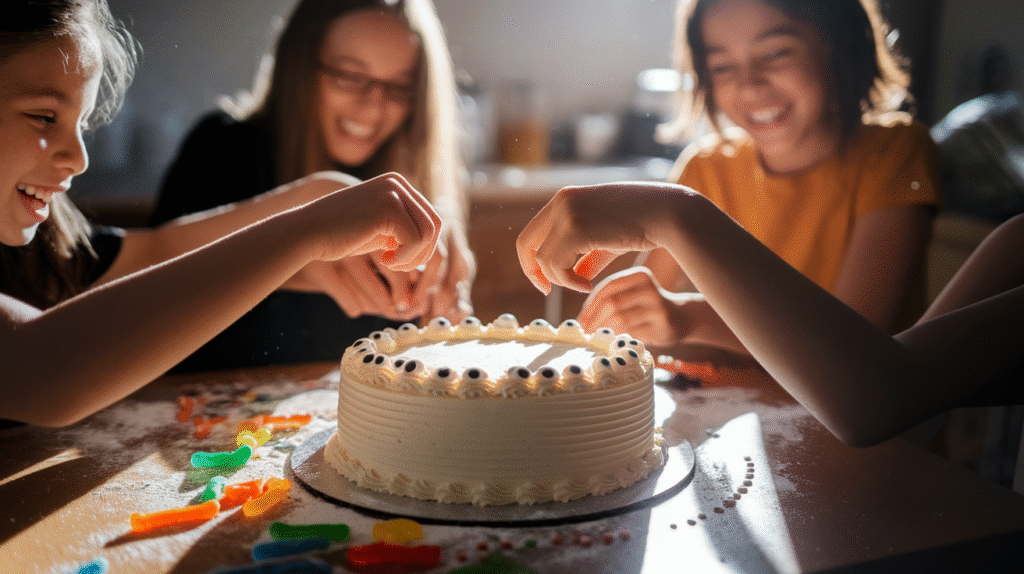
Decorating this cake is where the fun begins. Halloween opens the door to wild colors and silly, spooky faces, which means you can let creativity run wild without worrying about perfection. Kids love helping with the decorations, whether it’s plopping candy eyeballs or swirling neon frosting.
- Customizable designs guarantee no two cakes ever look the same.
- Perfect activity for family night or a Halloween sleepover.
- Taps into every kid’s excitement for hands-on fun.
Total Kid-Approved Winner
If your trick-or-treaters crave sweets, this cake is a guaranteed crowd-pleaser. The gooey frosting and playful toppings make every bite an adventure. Watch kids light up when they see the finished cake—these edible monsters and ghosts taste as good as they look.
- Sweet, moist, and irresistible with classic flavors.
- Toppings like gummy worms or marshmallow ghosts add extra fun.
- Makes every Halloween party more memorable.
Personal Tip: Make Ahead for Stress-Free Parties
Here’s one thing that saves me every Halloween—making the Spooky Halloween Cake a day ahead. The flavors get even better, and you’ll have more time to set up the rest of your party. For extra flair, use leftover decorations like candy corn or sprinkles around the cake for a quick, festive table setup.
With an easy process, endless decorating options, and guaranteed smiles, you’ll find yourself coming back to this Spooky Halloween Cake for years to come.
Ingredient Notes
Nothing brings a Spooky Halloween Cake together like the right ingredients. Whether you’re keeping things classic or trying to make your dessert allergy-friendly, each part of this cake plays a key role in delivering the finished look and taste. Here’s a closer look at what you’ll need, and some smart swaps you can use if you want to keep things simple or a bit healthier.
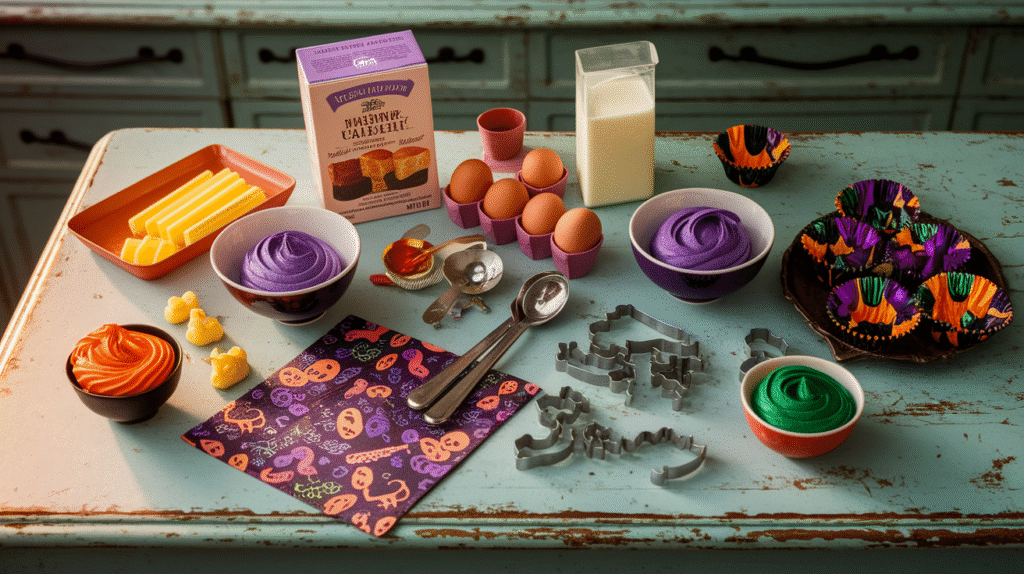
Cake Base: Foundation for Your Spooky Creation
The cake is the base for all your Halloween magic, so pick a flavor that’s easy and crowd-pleasing. You can use a store-bought mix to make things quick or whip up your favorite homemade recipe.
- Boxed Cake Mix: Choose chocolate or vanilla, or even marble for a surprise inside.
- Homemade Cake: If you like to bake from scratch, classic yellow or chocolate cake always wins.
- Egg-Free Option: Need a swap? Use a flax egg or your preferred egg replacer for an allergy-friendly version.
- Dairy-Free: Substitute milk with almond or oat milk, and use vegan butter.
No matter the method, what matters most is a moist and fluffy base that can handle generous layers of frosting and loads of candy.
Frosting: Your Colorful Canvas
Frosting transforms this cake from simple to spook-tacular. Go with whatever is easiest—just make sure it’s thick enough for piping and holding decorations in place.
- Buttercream: Classic, creamy, and holds its shape well for piping.
- Store-Bought Icing: Saves time, and you can tint it with gel food coloring for bold shades.
- Cream Cheese Frosting: Adds a rich tang but may be softer in warm kitchens.
- Dairy-Free or Vegan Frosting: Try ready-made vegan options or make your own with plant-based butter.
Pro tip: If food dyes are a concern, use natural coloring powders (like matcha for green or freeze-dried berries for purple).
Decorations: Toppings That Bring the Frights
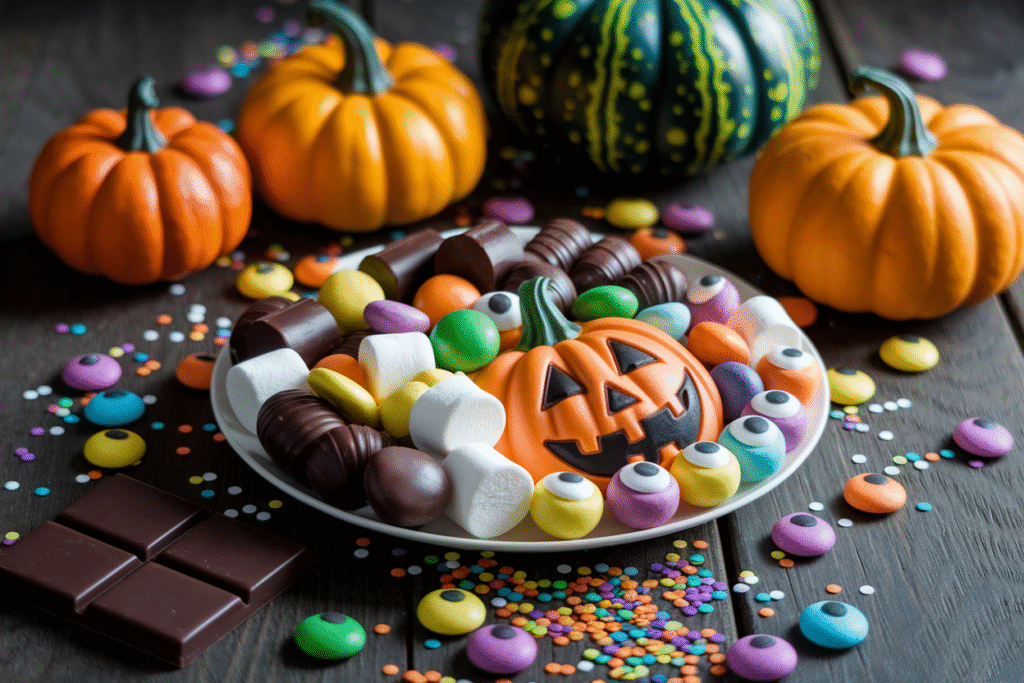
Here’s where your Spooky Halloween Cake gets its personality. There are no strict rules—just let your imagination run wild with candies, sprinkles, and anything sweet.
- Candy Eyes: Instantly turn blobs of frosting into goofy monsters.
- Halloween Sprinkles: Orange, black, and purple sprinkles make any cake a centerpiece.
- Gummy Worms: Let them slither out for a creepy-crawly touch.
- Marshmallows: Mini ones become ghosts with a dot of food coloring.
- Chocolate Chips: Use as eyes or add texture to “graveyard” dirt.
- Alternative Decorations: Use dried fruit or coconut flakes if you want a less sugary topping.
For a more classic vibe, pumpkin-shaped candies or cookies on top bring even more seasonal color.
Summary Table: Quick Ingredient Swaps
| Ingredient | Easy Substitute | Notes |
|---|---|---|
| Eggs | Flax egg, egg replacer | Vegan-friendly |
| Milk | Almond, oat, or soy milk | Dairy-free option |
| Butter | Vegan or plant-based butter | For vegan or lactose-free needs |
| Food coloring | Natural powders (beet, spinach) | For dye-free cakes |
| Candy toppings | Dried fruit, coconut, seeds | Healthier or allergy-friendly swap |
Whatever you choose for your Spooky Halloween Cake, the ingredients should make baking (and eating) as fun as the decorating. With a flexible list like this, everyone can get in on the fun while having a cake that fits their needs.
How to Make: Step-by-Step Spooky Halloween Cake
Getting a Spooky Halloween Cake from idea to centerpiece isn’t fussy or hard. The key is to get set up for success, keep your baking steps smooth, and finish with eye-catching decorations. Whether you’re baking with kids or making dessert for a party, these streamlined steps will save you time and keep things fun.
Preparation: Detail Setup Steps
Before you pour, mix or bake, set your kitchen up for easy success. Set out all your ingredients so they’re at room temperature, which helps with even mixing. Preheat your oven to the temperature listed on your cake mix or homemade recipe, usually 350°F (177°C).
- Grease and line your pans: Coat cake pans with butter or nonstick spray and line the bottoms with parchment paper for easy release. If you don’t have parchment, dust greased pans with a little flour.
- Gather all tools: Make sure your mixing bowls, spatulas, electric mixer and measuring cups are clean and ready.
- Have decorations on deck: Sort out your candies, sprinkles, food coloring, and piping bags (if using). Prepping decorations now means quick and easy decorating later.
Taking ten minutes to get organized pays off. It helps you spot if you’re missing something and keeps the baking process stress-free.
Baking & Assembling the Cake
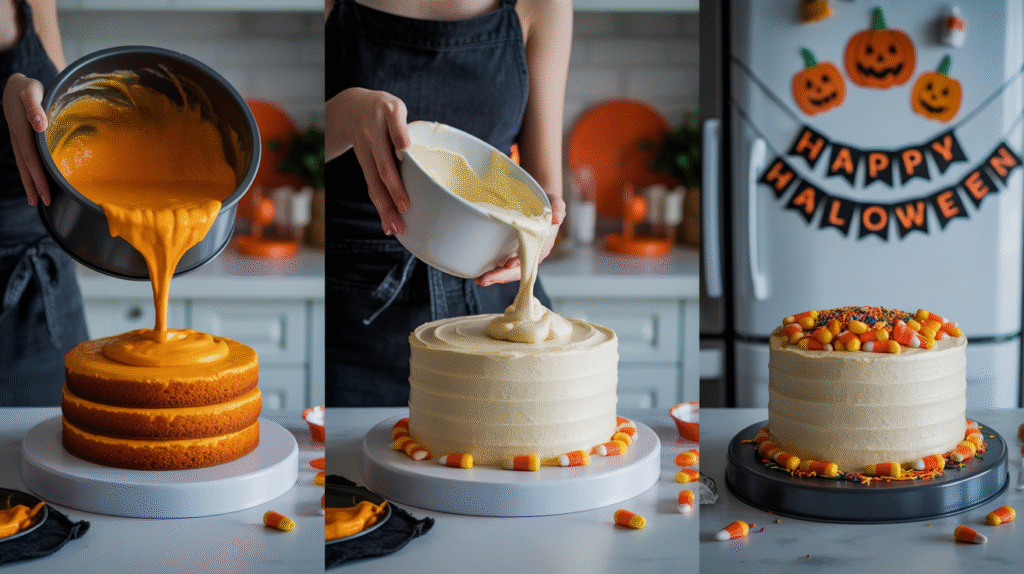
With everything in place, let’s move through the baking and assembly process in just a few focused steps:
- Mix the Cake Batter
- Use either a boxed cake mix or your favorite scratch recipe. Mix until smooth but don’t overwork the batter, or you risk a dense cake.
- Scrape the sides and bottom of the bowl to catch any pockets of flour.
- Bake the Layers
- Divide the batter evenly between prepared pans.
- Place in preheated oven and bake according to the recipe, usually 25–35 minutes, until a toothpick in the center comes out clean.
- If making cupcakes for single-serve spooky cakes, cut down baking time by a third.
- Cool Completely
- Let cakes rest in their pans about 10 minutes, then flip onto wire racks to cool all the way. Frosting warm cake can end in a melty mess.
- Stack and Frost
- Level the cooled layers with a serrated knife for a flat base. Place the first layer on your serving plate.
- Spread a thick, even layer of frosting over the first layer, add the next, and repeat for all layers. Coat the sides and top generously.
- Chill Before Decorating
- Pop the frosted cake into the fridge for 20–30 minutes. This sets the frosting so your decorations stay crisp and clean.
Decorating and Finishing Touches
The magic of a Spooky Halloween Cake comes alive with creative, quick decorations. Here’s how to turn that frosted base into something spooky and fun:
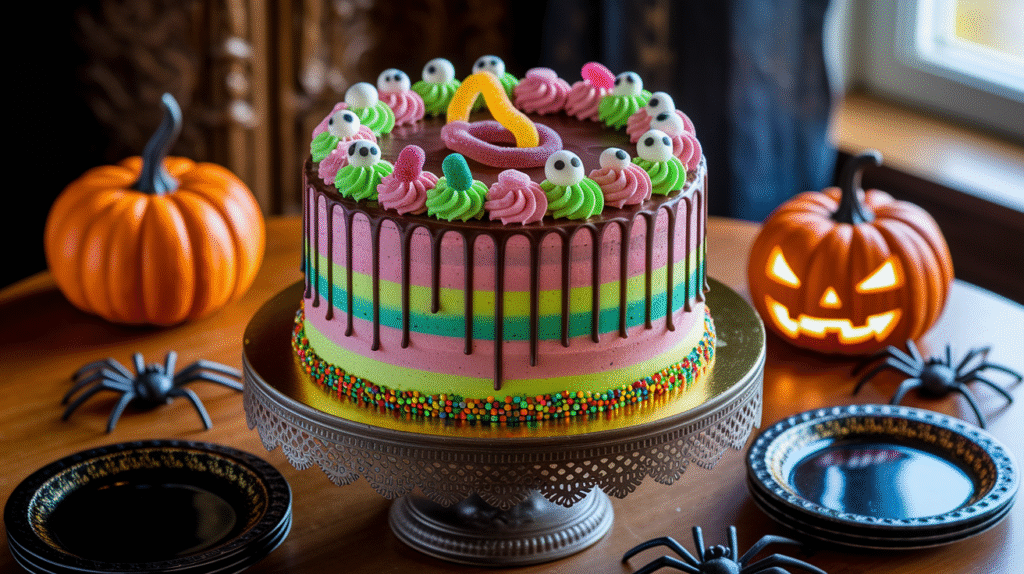
- Colorful Frosting: Divide your frosting into bowls, tint with gel colors like neon green, bright orange, or deep purple. Pipe or spread thick, dramatic swirls on the cake for an instant Halloween vibe.
- Candy Eyeballs & Gummy Features: Add candy eyes, licorice strips for stitches, or gummy worms crawling out of the sides. Arrange marshmallows as “ghosts” (just dot eyes with chocolate or food coloring).
- Spooky Sprinkles & Cookie Crumbles: Sprinkle the top with Halloween-themed jimmies. Crush chocolate sandwich cookies for “graveyard dirt” and add upright cookie “tombstones” with piped RIPs.
- Drip Effect: Warm a little chocolate or colored candy melts and drizzle over the top edge for a dripping, gooey effect.
- Quick Pro Hacks:
- Use zip-top bags as makeshift piping bags by snipping the corner.
- Layer upside-down ice cream cones as “witch hats” or towers.
- If in a hurry, let kids decorate their own sections with small candies or colored sugars for a less-polished but joy-filled cake.
Presentation counts, so place your cake on a big platter and scatter leftover candies and sprinkles around the base. Set out Halloween plates and napkins for a finished look that invites guests to dig in.
A Spooky Halloween Cake decorated this way will be the star of your Halloween party, drawing smiles and plenty of picture-taking. Have fun and let your imagination lead the way, knowing every step is designed for fuss-free fun and maximum impact.
Expert Tips for a Perfect Spooky Halloween Cake
If you want your Spooky Halloween Cake to stand out from the crowd (and last till the party’s over), these expert tricks make a big difference. Anyone can mix up a boxed cake or smear on some neon frosting, but the real magic comes from the details. With a few pro techniques, you’ll get vibrant colors, moist cake, and decorations that wow the crowd.
1. Keep the Cake Super Moist
Dry cake is a fast track to disappointment, especially when you’re making something special for Halloween. To lock in moisture:
- Swap out water for milk (dairy or non-dairy) when mixing the batter.
- Add a spoonful of sour cream or yogurt for richness.
- Don’t overbake—check your cake 5 minutes before the timer goes off.
If your cake does get a bit dry, brush the layers with simple syrup before frosting. It’s the secret weapon for a bakery-style texture.
2. Get Bold, Vibrant Colors Without the Mess
Halloween cakes should pop with color, but regular food dyes can sometimes fall flat or stain your hands. For rich, eye-catching shades:
- Use gel or paste food coloring, not liquid, for deeper hues.
- Always mix colors into your frosting a little at a time until you reach the shade you want.
- For a healthy twist, try beet powder for reds, matcha powder for green, or freeze-dried blueberry powder for purple.
Clean up is easy if you wear kitchen gloves while coloring your frosting.
3. Smooth, Fuss-Free Frosting Every Time
A clean, smooth frosting base makes your Spooky Halloween Cake look pro—even if you load up with wacky decorations later.
- Crumb coat your cake: spread a thin layer of frosting over the naked cake, chill for 15 minutes, then add your final layer.
- Use an offset spatula or even the back of a large spoon for easier smoothing.
- If your frosting feels stiff, beat in a teaspoon of milk at a time until it spreads easily.
Working with chilled cake layers will also help your frosting set and stay put as you decorate.
4. Decoration Shortcuts that Look Professional
You don’t need a pastry chef’s toolkit to pull off creative decorations. These shortcuts give you polished results:
- Use zip-top bags as piping bags for stripes, eyes, or drizzle effects—just snip a corner and go.
- Transform store-bought candies into spiders, ghosts, or monster eyes for instant wow.
- Sprinkle crushed cookies or colored sugars for a “dirt” base or eerie sparkle.
Don’t stress about perfection. Halloween is all about fun and a little chaos, especially when decorating with kids.
Quick Reference: Expert Spooky Halloween Cake Tips
Here’s a cheat sheet for fast success:
- Keep it moist with milk or sour cream.
- Go bold with gel colors or natural powders.
- Always crumb coat before you frost.
- Use simple tools for kid-friendly, pro-looking decorations.
Following these tips means your Spooky Halloween Cake will taste amazing and become the star of your Halloween table. Have fun and let your creative gremlins run wild!
Storage, Freezing & Reheating Tips
When your Spooky Halloween Cake is a hit, odds are you’ll have leftovers. Whether you want to prep ahead, store extra slices, or make the whole cake last through the week, smart storage keeps every bite just as tasty as day one. These tips ensure your masterpiece stays moist, flavorful, and ready for another round of haunting snack attacks.
Storing Your Spooky Halloween Cake
Once the party’s over, keep your cake tasting fresh with a little care and the right storage:
- Leave the cake at room temperature when you’ll eat it within 1-2 days. Just cover it with a cake dome, large bowl, or plastic wrap to stop it from drying out.
- For frosted cakes, place a piece of parchment or wax paper over any exposed slices before wrapping to prevent the frosting from sticking to the wrap.
- Refrigerate if your kitchen is warm or if your frosting uses cream cheese, whipped cream, or other dairy-based ingredients. Store the cake in an airtight container or wrap well in plastic wrap, then foil, for up to five days.
- Keep toppings like candy eyes or gummy worms from getting soggy by removing them before storing. Add these back on right before serving for the best texture and look.
Freezing the Cake for Later
You don’t have to say goodbye to leftover Spooky Halloween Cake. Freezing is a lifesaver if you want to bake ahead or simply can’t finish the whole cake at once:
- Let the cake cool completely before freezing. Frosted cakes can be frozen, but the texture of some decorations (like gummies or marshmallows) may change, so it’s best to freeze the undecorated cake if possible.
- Wrap each layer or slice tightly in plastic wrap, then again in foil for extra protection.
- Place the wrapped cake in a freezer-safe container or a heavy-duty zip-top bag to avoid freezer burn.
- Label your cake with the date. Eat within 2 months for the best flavor and freshness.
When it’s time to enjoy, thaw overnight in the fridge, then bring to room temperature before serving. For more tips on sweet treats that keep well in the freezer, check out this guide on delicious baked chocolate donuts, which includes advice on freezing and reheating for the freshest snacks every time: Delicious baked chocolate donuts.
Reheating Cake for Best Results
Warming up leftover Spooky Halloween Cake can bring back that fresh-baked feel. Here’s how to do it without accidentally melting the decorations:
- Unwrap the cake and transfer it to a microwave-safe plate if you’re using the microwave. Heat individual slices in 10-15 second intervals. This gently softens the cake without turning the frosting to mush.
- For a big leftover piece, let it sit at room temperature for about an hour. If you want it slightly warm, pop it in a 300°F (150°C) oven for 8–10 minutes (again, skip any heat-sensitive toppings).
- If your decorations don’t do well with heat, remove them before warming and put them back on afterward.
Proper reheating makes leftover slices just as inviting as the day you baked them. Remember, storage and reheating tips work best when you start with a moist, fluffy cake, so all that effort in the baking and decorating stage really pays off later.
Keeping your Spooky Halloween Cake fresh could not be easier. With these storage, freezing, and reheating tips, you can plan ahead for any event, prevent food waste, and enjoy your cake whenever the spooky craving hits.
Creative Variations for Every Goblin & Ghoul
When it comes to making a Spooky Halloween Cake, there’s no reason to stick to just one flavor or style. Halloween is the best excuse to get wild with colors, textures, and shapes. Whether you’re baking for picky eaters, guests with food allergies, or friends who crave something adventurous, there’s a cake combination to fit everyone at your table.
Wicked Color Combos & Flavor Surprises
Why settle for the same old yellow or chocolate cake? This is your chance to wake up your taste buds and wow the crowd. You don’t have to stop at orange and black! Here are some ideas for cakes that taste as bold as they look:
- Green Monster Cake: Use matcha powder or green food coloring to tint a vanilla cake base. Layer with chocolate frosting and candy eyes for a truly eerie (but delicious) green monster.
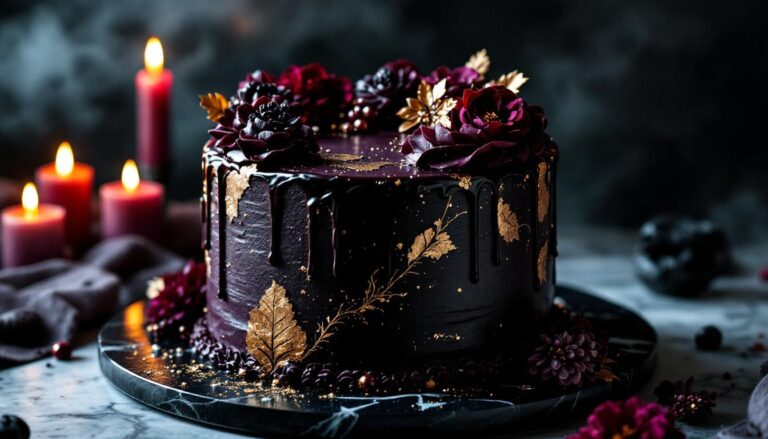
- Midnight Velvet: Bake up a black cocoa cake with a deep purple or electric blue frosting. Try adding blackberry or blueberry preserves between layers for a bite that’s dark and fruity.
- Creepy Candy Corn Cake: Layer yellow, orange, and white cake batters for a candy corn effect. You’ll get a burst of color in every slice—no food dye needed if you flavor each layer naturally (think orange zest, lemon, and vanilla).
Allergy-Friendly & Dietary Options
Bringing the fun to everyone is easy with a few swaps. No goblin should miss out on cake, so try these smart options:
- Gluten-Free Cake: Substitute your usual mix or recipe with a gluten-free blend from the supermarket. Stick with almond or coconut flour for extra flavor. Just remember to check your candy toppings to make sure they’re gluten-free too.
- Vegan Delight: Use a plant-based milk like oat or almond, swap eggs with ground flax or chia “eggs,” and pick up a vegan butter for the frosting. Store-bought vegan cake mixes are also easy to find and work well with most Halloween cake recipes.
- Lower Sugar or Dye-Free: Use ripe bananas or applesauce to reduce added sugar. Skip artificial coloring and use natural food powders—beet for red, turmeric for yellow, matcha for green.
These swaps make it easier than ever to serve a Spooky Halloween Cake to everyone, with no flavor left behind.
Unique Frosting & Topping Twists
Frosting is where the decorating magic happens, so don’t be afraid to try something unexpected. If you want your cake to stand out, mix and match these topping ideas:
- Glow-in-the-Dark Icing: Tint frosting with tonic water (contains quinine) and add a black light to your Halloween party. Your cake will glow in the dark!
- Marshmallow Webs: Melt marshmallows and stretch them between your hands, then drape across the cake for an instant spiderweb effect.
- Tangy Citrus Drizzle: Whip up an orange glaze using fresh juice and zest for a sharp, zippy finish. This balances out sweeter cakes and surprises your guests with fresh flavor.
Frosting isn’t just about looks—it’s about adding a new level of flavor and texture. Even a simple buttercream can get a Halloween upgrade.
Make It Your Own
Get inspired by your favorite spooky characters, classic horror movies, or the wildest Halloween candy in the aisle. Try these quick ways to customize your next Spooky Halloween Cake:
- Shape the cake like a cauldron, eyeball, or pumpkin using simple carving tricks.
- Pile on themed candies or cookies for bonus color and crunch.
- Mix up piping tips and designs (even a simple star tip can create monster fur or witch hat textures).
The best part about Halloween cakes is there are no rules—only room for bold choices and big fun in every bite. With these creative variations, your kitchen will become the most haunted (and sweetest) spot in the house.
What to Serve With Your Spooky Halloween Cake
A Spooky Halloween Cake is a showstopper all on its own, but pairing it with the right sides and drinks will make your Halloween celebration even more memorable. Whether you’re throwing a kid-friendly bash or hosting adults who love a good themed snack, adding a few simple extras can balance out the sweetness or round out your treat table. Here’s how to serve up an unforgettable Halloween spread.
Savory Snacks to Balance the Sweet
After a big slice of Spooky Halloween Cake, everyone craves something salty or savory to cut through the sugar rush. Place out a few of these easy bites next to your cake for instant crowd-pleasing balance:
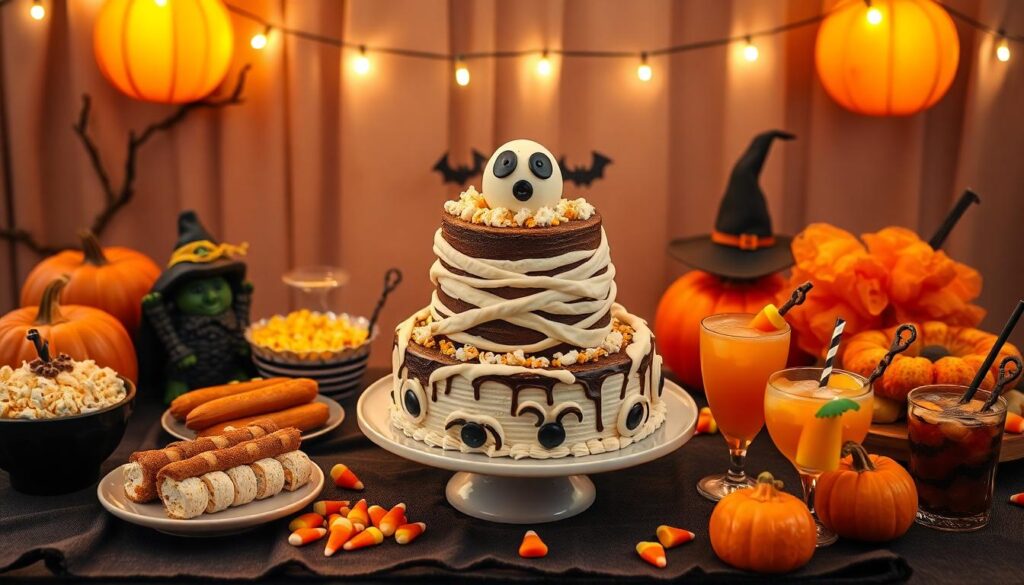
- Witch’s Broomstick Pretzels: Pretzel sticks paired with cheese strings (tied at the end with chives) look festive and offer a quick nibble for kids or adults.
- Mummy Hot Dogs: Wrap mini sausages or hot dogs in strips of crescent dough to create spooky “mummies.” Serve with ketchup for a quick dip.
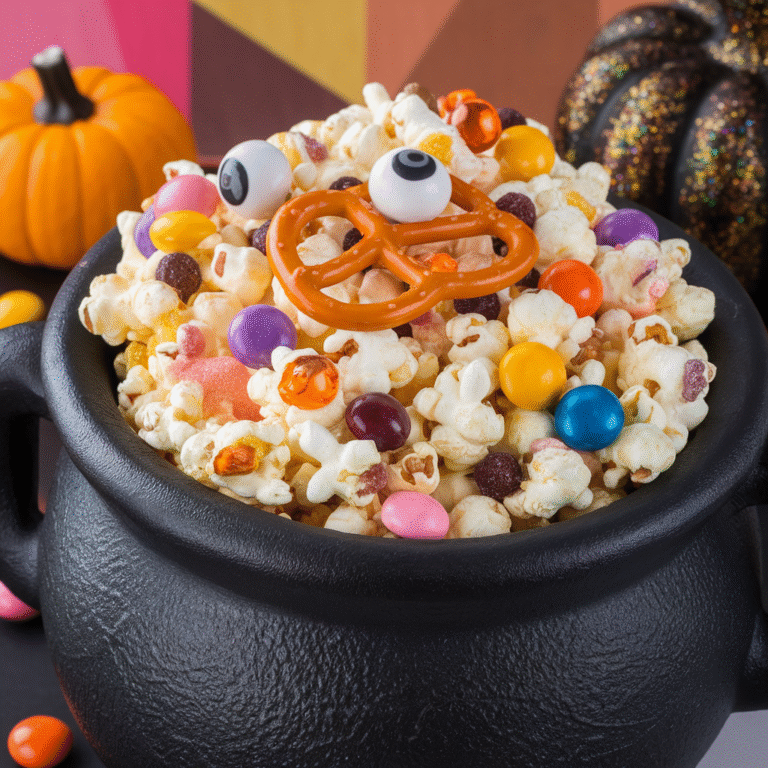
- Monster Popcorn Mix: Toss popcorn with orange and purple candies or candy corn. A scatter of chocolate chips adds a sweet-and-salty pop without overwhelming the cake.
These snacks aren’t just playful, they also help keep guests full and happy, reducing the sugar overload.
Fun Drinks and Creepy Beverages
Sweet cakes need sips that refresh and tie in the theme. Bring your dessert table to life with bright, family-friendly drinks—plus a sophisticated option for adults who want something a little different.
- Bloody Berry Punch: Mix cranberry juice, orange juice, and lemon-lime soda in a clear punch bowl. Add floating “eyeballs” made from peeled grapes or lychees for a ghoulish effect.
- Witch’s Brew Smoothie: Serve up green or purple smoothies in clear cups for a nutritious, Instagram-ready treat. Try this light and fruit-filled Strawberry Blueberry Smoothie Recipe for a fun drink that looks just as festive as any themed punch.
- Spooky Sparkling Water: Chill sparkling water with slices of blood orange or frozen blackberries. Drop in some gummy worms to float on top for an instant Halloween twist.
Let guests choose a drink that fits their style, and offer options for all ages.
One Creative Pairing: Candy Corn Fruit Skewers
Want one more idea that goes beyond the usual chips and punch? Candy Corn Fruit Skewers are a creative, healthy touch that looks right at home beside a Spooky Halloween Cake. Simply layer pineapple, orange segments, and banana slices on a stick to mimic the color pattern of classic candy corn. Arrange on a platter with a side of yogurt dip—kids and adults alike will reach for these bright, cheerful skewers.
Quick Recap: Sides and Sips for Your Cake Table
For a balanced and eye-catching Halloween dessert spread:
- Serve savory bites like mummy hot dogs and cheese broomsticks.
- Pour up festive drinks—fruit punch, smoothies, or sparkling water with Halloween garnishes.
- Add a creative, healthy side like candy corn fruit skewers.
Mix and match these simple pairings with your Spooky Halloween Cake for a party setup that feels thoughtful, tasty, and just the right amount of spooky.
Frequently Asked Questions (FAQs)
If you’re new to baking a Spooky Halloween Cake or just want tricks for making things less stressful, you’re not alone. Below you’ll find real answers to some of the most common questions about making, decorating, and serving this fang-tastic cake. Whether you’re planning ahead for a party, wondering about creative swaps, or want to be sure your details turn out just right, these FAQs will help you avoid mishaps and serve up something everyone raves about.
How far in advance can I make a Spooky Halloween Cake?
You can bake and decorate your Spooky Halloween Cake up to 2 days before your event. Cakes actually taste even better the next day, since the flavors have time to settle. If you’re prepping ahead, store the cake in an airtight container at room temperature (if your frosting is buttercream) or in the fridge (for cream cheese or whipped cream frostings).
If you want to stretch that window, bake your cake layers in advance, wrap them tightly, and freeze for up to two months. Thaw overnight in the fridge, then decorate as close to your event as possible for the freshest look.
What are the easiest decorations for a Spooky Halloween Cake that kids can help with?
Kids love decorating cakes, and Halloween is perfect for bold, silly designs! The easiest, most hands-on decorations include:
- Candy eyes for instant monster faces
- Gummy worms for that creepy-crawly look
- Halloween sprinkles in wild shapes or colors
- Mini marshmallows as ghost toppers (just dot eyes with food coloring or chocolate)
- Colored frosting swirls or drips spread with a spoon
- Cookie “tombstones” using simple store-bought chocolate cookies and white icing
These options let little ones get creative without much mess or fuss. The best part? There’s no need for perfection—wonky monsters are even cuter!
Can I make a Spooky Halloween Cake with allergy-friendly ingredients?
Absolutely. If you need to avoid common allergens, tasty results are still within easy reach:
- For a gluten-free cake, use your favorite gluten-free cake mix or flour blend. Always check candy decorations for sneaky gluten.
- For dairy-free cakes, choose plant-based milk and butter alternatives, and double-check your frosting ingredients.
- For egg-free baking, mix up a flax “egg” (1 tablespoon ground flaxseed plus 2.5 tablespoons water per egg) or go with an egg replacer from the baking aisle.
- For a lower sugar cake, swap in applesauce or mashed banana to replace some of the sugar, or reduce the amount of frosting and pile on fruit, dried cranberries, or coconut flakes.
These simple swaps help everyone get a slice of spooky fun, no matter what they can (or can’t) eat.
What’s the best way to serve and store leftover Spooky Halloween Cake?
Cut your cake with a sharp, warm knife (run it under hot water and wipe dry for smooth slices). Serve on plates with napkins, since colorful frosting can be messy—especially for kids.
When storing leftovers, keep your Spooky Halloween Cake in an airtight container. Most cakes keep well at room temperature for a day or two unless the frosting is perishable, in which case, store in the fridge. Remember to remove delicate decorations like gummies or certain candies before refrigerating; these can go back on right before you serve another round.
If you plan to freeze leftover cake, wrap slices tightly in plastic and foil. Thaw slices overnight in the fridge or let them come to room temp for a little bit before enjoying. This helps maintain the cake’s texture and taste so you can treat yourself days (or weeks) later.
Ready to make your own Spooky Halloween Cake? These quick answers take the guesswork out and help you focus on the fun—a chill process, a happy crowd, and the best kind of spooky you can eat!
Conclusion
Making a Spooky Halloween Cake is all about having fun and keeping things simple. You get bright colors, playful toppings, and big flavor without a lot of fuss. This cake brings everyone together, whether you’re baking with family or sharing at a party.
Give this recipe a try and see just how easy and memorable your Halloween can be with a Spooky Halloween Cake on the table. If you have favorite decorating tips or creative variations, share them in the comments—your ideas might inspire someone else’s next treat.
Every homemade cake adds a little more magic to Halloween night. Thanks for reading, and don’t forget to pass this post along to friends who want to make their own Spooky Halloween Cake this season!

![Halloween Party Food Ideas for a Spooky, Crowd-Pleasing Spread [2025]](https://boredpedia.com/wp-content/uploads/2025/08/Spooky-Donuts-On-Table-768x512.webp)