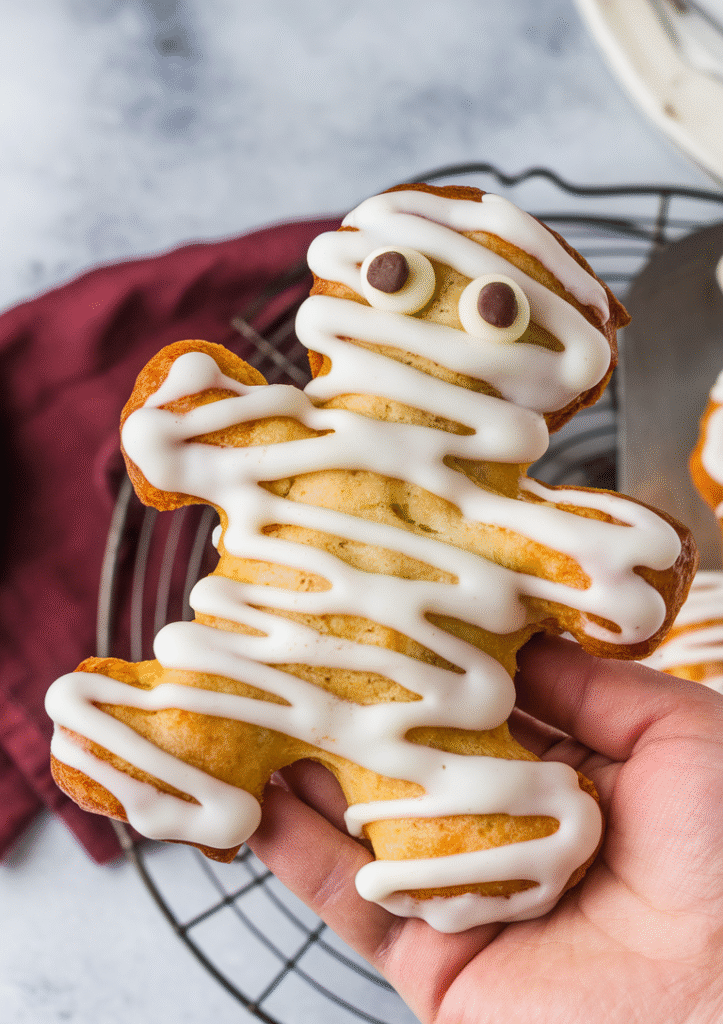
Halloween Mummy Pop Tarts
Halloween calls for treats that are as fun to make as they are to eat, and nothing fits the bill quite like homemade Mummy Pop Tarts. These flaky pastries filled with strawberry jam will bring a smile to everyone who sees them. Whether you’re throwing a party, keeping the kids busy, or just relaxing with a seasonal snack, these Mummy Pop Tarts make Halloween even sweeter. Let’s walk through everything you need to know to bake these easy, crowd-pleasing treats from start to finish.
Why Mummy Pop Tarts Are Perfect for Halloween
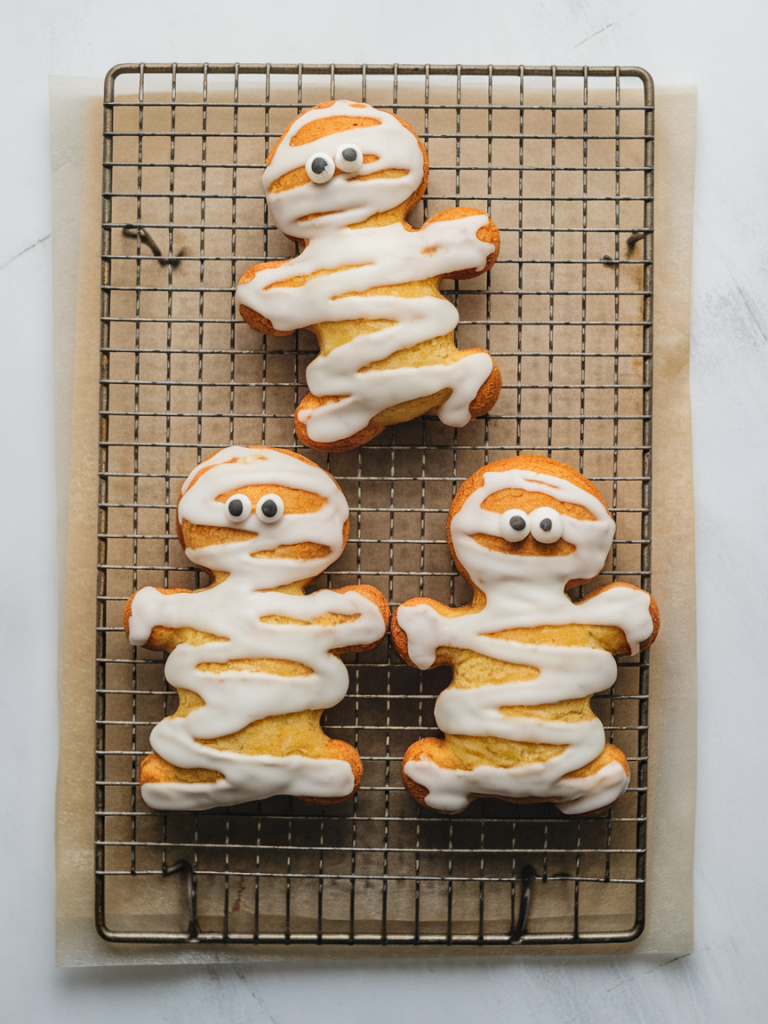
Mummy Pop Tarts stand out because they’re simple, adorable, and delicious. They don’t require fancy baking skills or rare ingredients. Most of what you need can be found in any grocery store. The look is classic Halloween, with white icing “bandages” and edible eyes that add just the right touch of spooky fun. They’re also a great way to get the family in the kitchen together. Kids can help cut and fill the pastry, pipe the icing, and place the eyes.
These treats fit any spooky occasion, from classroom parties and neighborhood gatherings to themed movie nights. You can prepare them in advance and store them for a quick snack or set up a decorating station so each person can create their own mummy design. The versatility makes them a repeat favorite every October.
Ingredients You’ll Need
To bake these homemade Mummy Pop Tarts, start by gathering a few basic items. Here’s your shopping checklist:
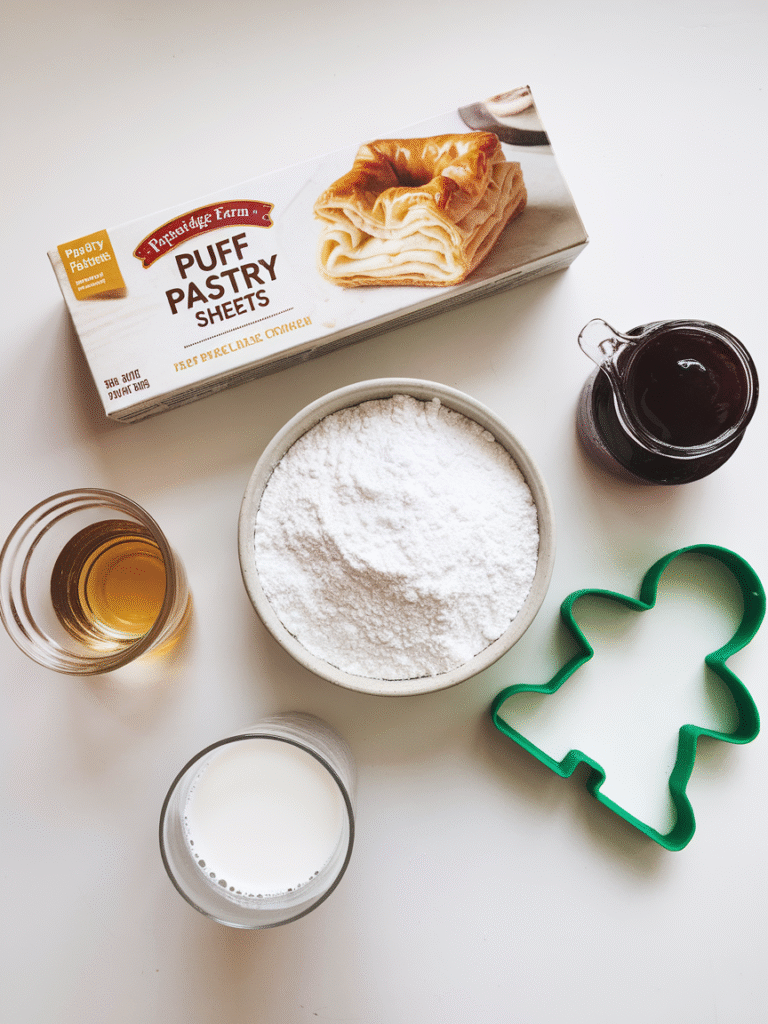
- 2 sheets of refrigerated puff pastry (let them thaw before using)
- ¾ cup strawberry jam (you can swap with raspberry, cherry, or even chocolate spread if you like)
- 1 large egg (for the egg wash)
- Edible candy eyes (find these in the baking aisle around Halloween)
For the homemade icing:
- 1 ½ cups powdered sugar
- ½ teaspoon vanilla extract
- 3–4 tablespoons milk (add more or less for the right thickness)
Optional: If you want a crispier texture, sprinkle a little granulated sugar over the egg-washed dough before baking.
Equipment
Before you start, grab these kitchen tools:
- Large gingerbread man cookie cutter (or any people-shaped cutter you like)
- Baking sheet lined with parchment paper
- Small bowl and a whisk (to mix the icing)
- Piping bag (or a zip-top bag with a small corner snipped off)
- Fork for sealing and venting the dough
- Pastry brush (for the egg wash)
- Cooling rack with parchment underneath (for icing cleanup)
Step-by-Step Directions
Follow these steps to get flaky, golden-brown Mummy Pop Tarts with plenty of spooky charm.
1. Prepare Your Oven and Workspace
Heat your oven to 350°F. Place parchment paper over your baking sheet. Let the puff pastry thaw according to the package instructions so it’s easy to roll and cut.
2. Cut Out the Shapes
Unfold one pastry sheet at a time. Use the cookie cutter to press out six large “people” shapes. Re-roll scraps as needed to get enough cutouts. You’ll use two shapes for each completed Pop Tart.
3. Add the Jam
Lay three cutouts on your prepared baking sheet, spacing them out to prevent sticking. Spoon about a tablespoon of strawberry jam into the center of each, keeping it at least half an inch away from the edges so they seal and don’t leak.
4. Top and Seal
Place another pastry cutout over each of the jam-filled bottoms. Use a fork to press around the edges and seal them shut. Poke small holes in the top of each pastry with a fork so steam can escape during baking. This keeps your Mummy Pop Tarts from getting soggy.
5. Egg Wash
Crack the egg into a small bowl, whisk until smooth, then brush a thin layer on top of each pastry. This helps them brown up nicely.
6. Bake
Place the tray in the oven and bake for around 20 minutes, or until the pastries look puffed and golden. Watch for a bit of jam to bubble out, which is normal. Remove from the oven and let them cool on the tray for a few minutes before moving to a wire rack.
7. Make the Icing
While the Pop Tarts cool down, mix your icing. Whisk powdered sugar, vanilla, and 3 tablespoons of milk in a bowl. If it looks too thick, add a bit more milk. You want it to feel like thick glue so it sets on the pastry without running. Spoon the icing into your piping bag.
8. Decorate Your Mummies
Once the pastries are mostly cool, stick two edible eyes on each. If the surface is still warm, gently press them in so the next layer of icing helps secure them.
Starting at one side, pipe the icing back and forth in rough strips to mimic mummy bandages. Crisscross in different directions for a messy, wrapped look, leaving the eyes visible. If icing drips onto the parchment below, that’s fine—it makes cleanup easy.
9. Let Icing Set
Allow the icing to dry about 20 minutes so it won’t smear when you pick up the pastries. After that, you can serve them or store them for later.
Tips for the Best Mummy Pop Tarts
- Don’t overfill with jam. Too much causes leaks.
- Keep layers of puff pastry chilled while you work so they’re easier to handle and bake up flakier.
- For an extra pop, flavor your icing with a drop of almond extract or lemon juice.
- Pipe icing in uneven lines for a more “bandaged” look—neat isn’t necessary.
- Store leftovers in an airtight container. While these are best the day they’re made, they’ll keep for 2-3 days at room temperature.
- Reheat briefly in a toaster oven if you want them warm again.
Variations and Swaps
The classic Mummy Pop Tarts use strawberry jam, but you can easily change things up:
- Use raspberry, blueberry, or apricot jam for different flavors and colors.
- Try Nutella or chocolate-hazelnut spread if you want a chocolate filling.
- For a peanut butter twist, use a layer of peanut butter and a little jelly.
- If you like spice, swap in apple butter with a dusting of cinnamon sugar.
The icing can also be tinted with a bit of food coloring for a creative touch. Pale green or classic white both work well for a mummy look.
Fun Ways to Get Kids Involved
Mummy Pop Tarts are great for little hands. Let kids help with:
- Using the cookie cutter to make shapes
- Spreading jam (supervised)
- Sticking on candy eyes
- Piping on icing (imperfection makes it cuter!)
You can even set up a decorating station for a party so each person can make their own personalized mummy dessert.
When to Serve Mummy Pop Tarts
- Halloween parties (for kids or adults)
- School events or bake sales
- Family movie nights with a scary theme
- Trick-or-treat snacks
- Office potlucks
They work as desserts or breakfast pastries and always look festive on a Halloween-themed table. Pop them in cellophane bags for cute homemade gifts or favors.
Frequently Asked Questions
Can you freeze Mummy Pop Tarts?
Yes. Freeze after baking, before decorating. Thaw at room temperature, then add icing and eyes once fully defrosted.
What if I don’t have a people-shaped cookie cutter?
You can use a simple rectangle cutter or even cut with a knife. Decorate with bandages and eyes to give them mummy faces anyway.
Can I make these gluten-free?
Use a gluten-free puff pastry and follow the recipe as usual. Double check the jam and candy eyes to be sure they’re also gluten-free if needed.
Nutrition Info (Estimated Per Pop Tart)
- Calories: 340
- Carbs: 44g
- Sugar: 23g
- Fat: 15g
- Fiber: 1g
- Protein: 5g
Note: Values will vary with brand and filling swaps.
Storing and Serving
Keep Mummy Pop Tarts at room temperature in an airtight container. If the weather is warm, you can refrigerate them, but the pastry may soften. For crisp pastry, warm in a 300°F oven for a few minutes before eating. Avoid stacking them while the icing is wet, as it may cause the decorations to smudge.
These treats taste best within two days, but if you need to keep them longer, freeze the plain pastries and decorate after thawing.
Homemade vs. Store-Bought: Why Make Your Own?
While you can buy Halloween-themed treats at the store, making your own Mummy Pop Tarts sets your dessert table apart. You control the fillings, flavor, and decoration. Homemade versions have a flakier pastry and a much fresher taste, especially when enjoyed right after baking. Plus, homemade Mummy Pop Tarts are a great project to make memories with family and friends.
Final Thoughts
This Halloween, bring a little extra fun to your kitchen with homemade Mummy Pop Tarts. Simple ingredients, easy steps, and room for creativity make these pastries a must-try for the holiday season. Serve them warm on a spooky night, hand them out at parties, or pack them in lunchboxes for a sweet surprise.
Don’t forget to snap a picture of your creations before they vanish. Mummy Pop Tarts are proof that some of the best Halloween moments happen when you gather around the table, laugh, and make something delicious together.
Ready to bake? Gather your puff pastry, grab the strawberry jam, and let the decorating begin. Happy Halloween!

