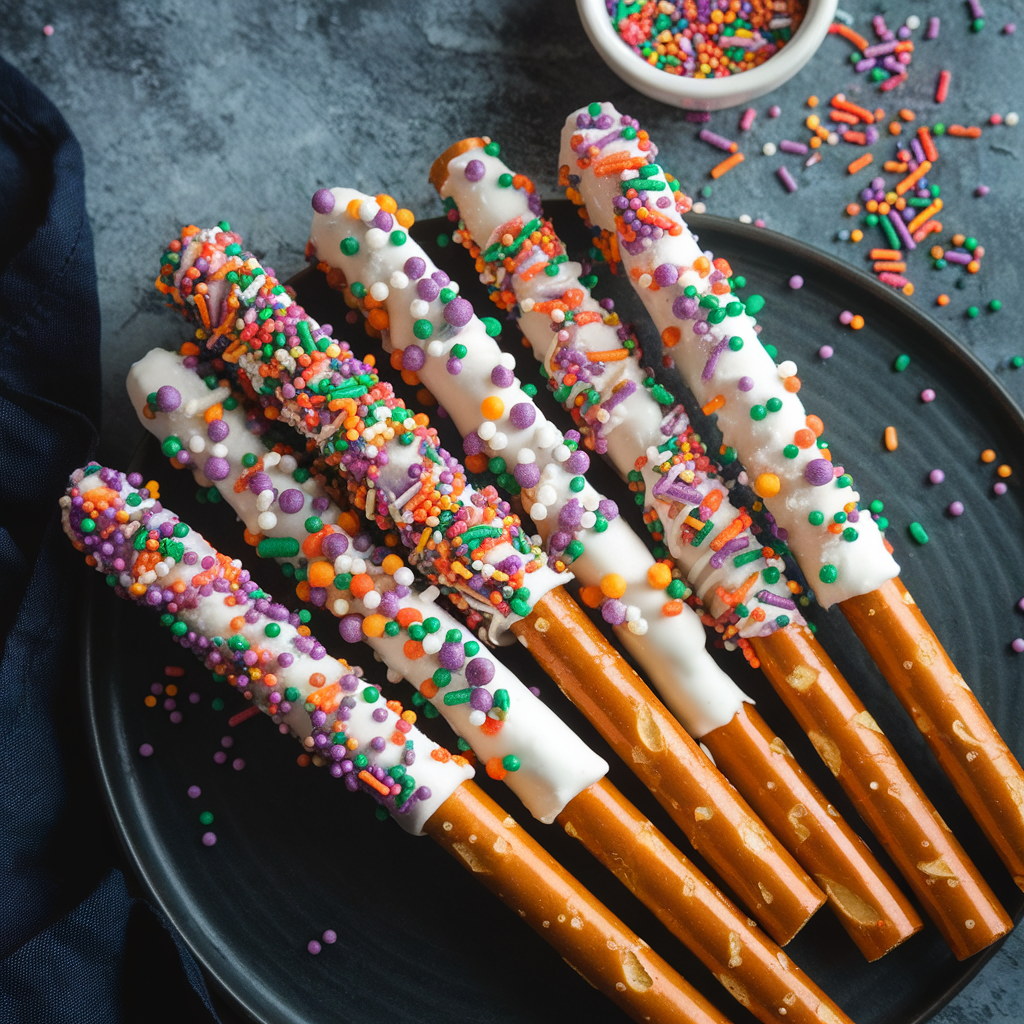
Spooky & Sweet Halloween Pretzel Rods That Everyone Will Love
Halloween Pretzel Rods are a fun, colorful treat that takes any party table up a notch. They’re easy to make, give you endless options to customize, and taste great with that perfect salty-sweet crunch. These treats are loved by kids and adults, which makes them ideal for family gatherings, classroom parties, or even creative gifting. Their eye-catching designs are all over Pinterest and social media, showing just how popular and shareable they’ve become every October.
What You Need to Make Halloween Pretzel Rods
Getting ready to make Halloween Pretzel Rods is the best part—sometimes, it’s more fun than eating them. Before diving into dipping and decorating, it’s important to set out all the essentials. Having everything within reach keeps the process smooth and mess-free, especially if little helpers are joining in. Whether you’re going with classic chocolate or want to try allergy-friendly swaps, here’s what you’ll need.
Essential Ingredients and Supplies
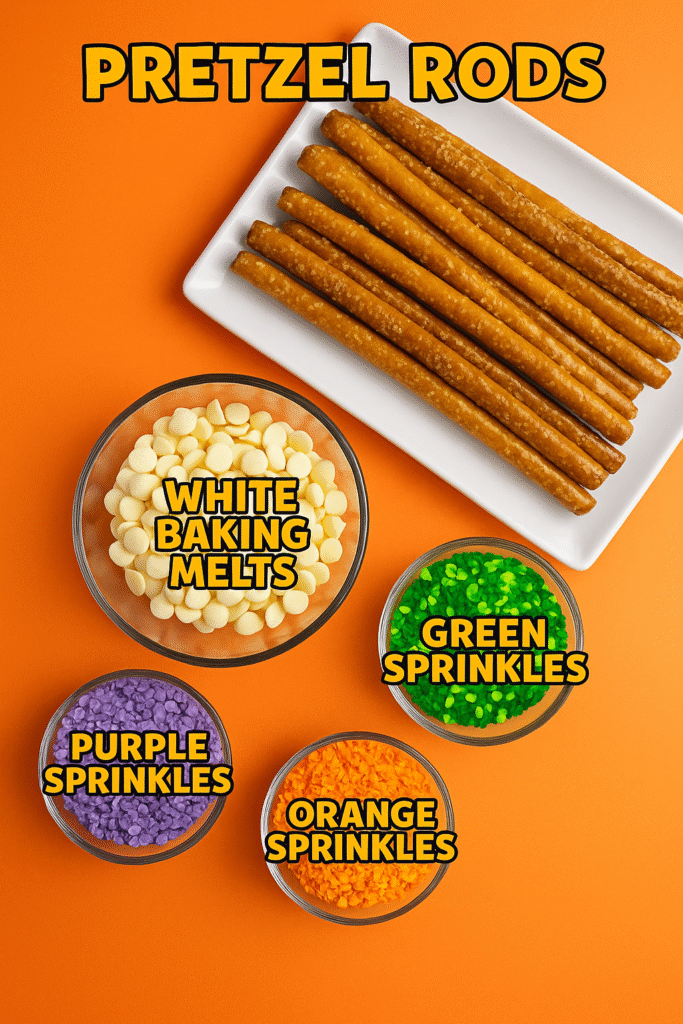
To make eye-catching and delicious Halloween Pretzel Rods, grab these basics:
- Pretzel rods: Standard long pretzel rods work best. They hold up to dipping and have just the right crunch.
- Chocolate or candy melts: Chocolate chips, almond bark, or candy melts all work. Candy melts give you the best color choices (orange, purple, green, or white for mummies and ghosts). Milk, dark, or white chocolate chips also melt well for a rich coating.
- Assorted toppings: Choose a variety of sprinkles, colored sugars, and mini chocolate candies. Edible eyeballs give your rods a monster vibe.
- Decorative candies: Candy corn, mini M&Ms, or chopped up gummy candy make each pretzel unique.
If you’re looking for allergy-friendly options, you can swap out regular chocolate for nut-free chocolate or use vegan chocolate chips. Gluten-free pretzel rods are widely available and taste just as good. Many stores now sell plant-based or dye-free sprinkles for anyone avoiding artificial colors.
Store-bought supplies make this project easy. Pre-colored candy melts and packs of mixed sprinkles save time and let you focus on the fun. If you want to get creative, you can melt white chocolate and tint it yourself with gel food coloring. This gives you more control over your shade or theme.
Kitchen Tools and Decorating Equipment
A smooth decorating experience starts with the right kitchen tools. Set your table with these must-haves before you melt a single chip:
- Mixing bowls: Use microwave-safe bowls for melting chocolate or candy wafers.
- Parchment paper: Line your counter or trays for easy cleanup and to prevent sticking.
- Spatula or spoon: Handy for stirring chocolate and spreading a thin layer evenly onto the pretzel.
- Baking sheet: Lay your decorated rods here to set (or to pop in the fridge if you’re in a hurry).
- Measuring cups: Scoop toppings into small bowls so everything’s ready to sprinkle.
Want to take your pretzels to the next level in design? Try adding a few specialized tools:
- Piping bags or zip-top bags: Fill with melted chocolate and snip the corner for neat lines, zigzags, or spiderwebs.
- Sprinkle trays or shallow plates: Roll dipped rods in toppings without waste and keep your counters clean.
- Toothpicks or skewers: Ideal for creating fine details or attaching neat little candies.
- Cooling rack: Place decorated rods on the rack for quick, even setting.
Having these tools ready helps every step go quickly, from dipping and decorating to setting and gifting. If you’re working with kids, small tongs or kid-sized gloves can help keep hands clean and create less mess.
With these ingredients and tools, you’ll breeze through prep and spend more time getting creative with your Halloween Pretzel Rods.
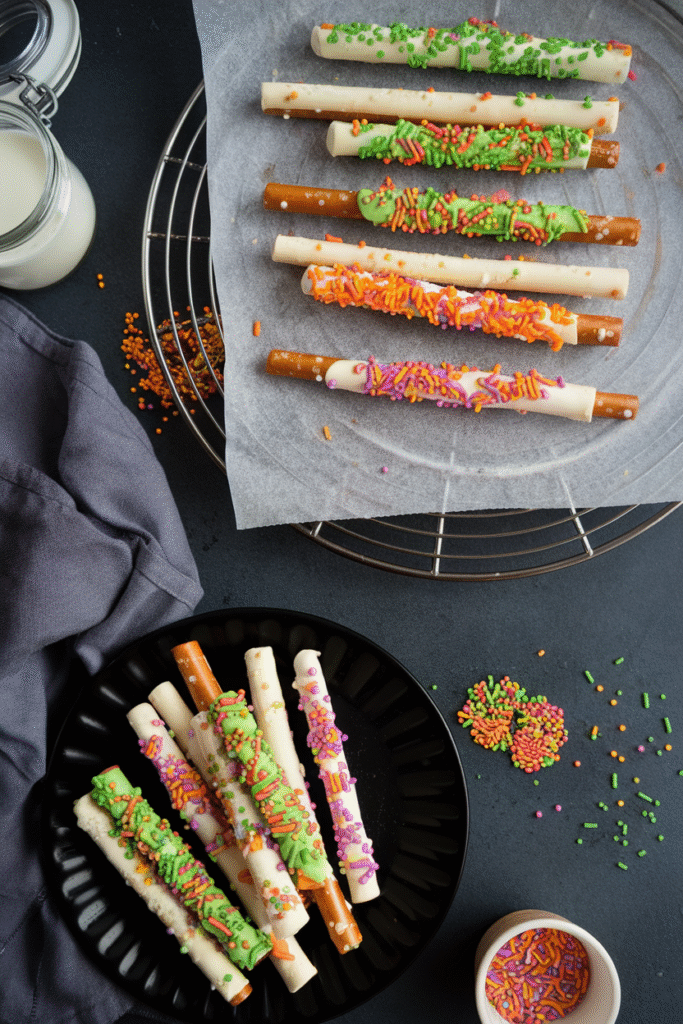
Step-by-Step Guide: Making Halloween Pretzel Rods
Creating Halloween Pretzel Rods is like setting up an edible art station in your kitchen. When you break it down into easy steps—prepping, melting, dipping, and decorating—you’ll breeze through the process with fewer messes and more creative fun. This section will walk you through each part, so your rods come out looking festive and taste delicious every time.
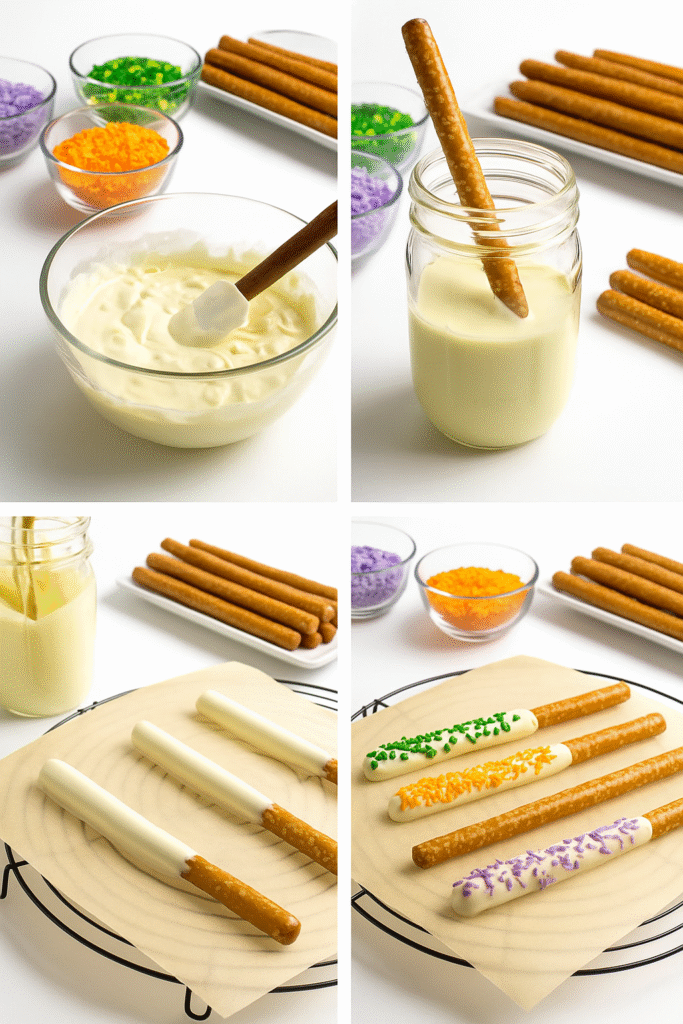
Prepping, Melting, and Setting Up
Start by prepping your workspace for sticky, colorful fun. Lay out sheets of parchment paper or wax paper on your counter or baking trays. This prevents the rods from sticking and makes cleanup fast. Arrange bowls of toppings and candies nearby, so you’re not hunting for sprinkles while chocolate drips everywhere.
Workspace Prep:
- Wipe down surfaces for a clean area.
- Gather all rods, toppings, and tools.
- Line trays with parchment or wax paper.
- Set up cooling racks if you want faster setting.
Melting Chocolate or Candy Melts:
You can melt chocolate in the microwave or use a double boiler. Both work, but safety and patience are key.
Microwave Method:
- Add chocolate chips or candy melts to a microwave-safe bowl.
- Heat in short bursts (20–30 seconds), stirring after each. Stop when it’s almost melted—residual heat will finish the job.
- Avoid overheating, or the chocolate may seize.
Double Boiler Method:
- Fill a small pot with one inch of water and bring it to a simmer.
- Place a heatproof bowl over the pot, making sure it doesn’t touch the water.
- Stir chocolate as it melts, keeping the temperature low.
Safety Tips:
- Melt slowly to keep chocolate smooth.
- Use oven mitts and dry bowls—water can ruin melted chocolate.
- Don’t let children handle hot bowls without help.
For more tips on melting chocolate for desserts, check out the process used in the Baked Chocolate Donuts Recipe. The step-by-step approach there applies well to candy melts, too.
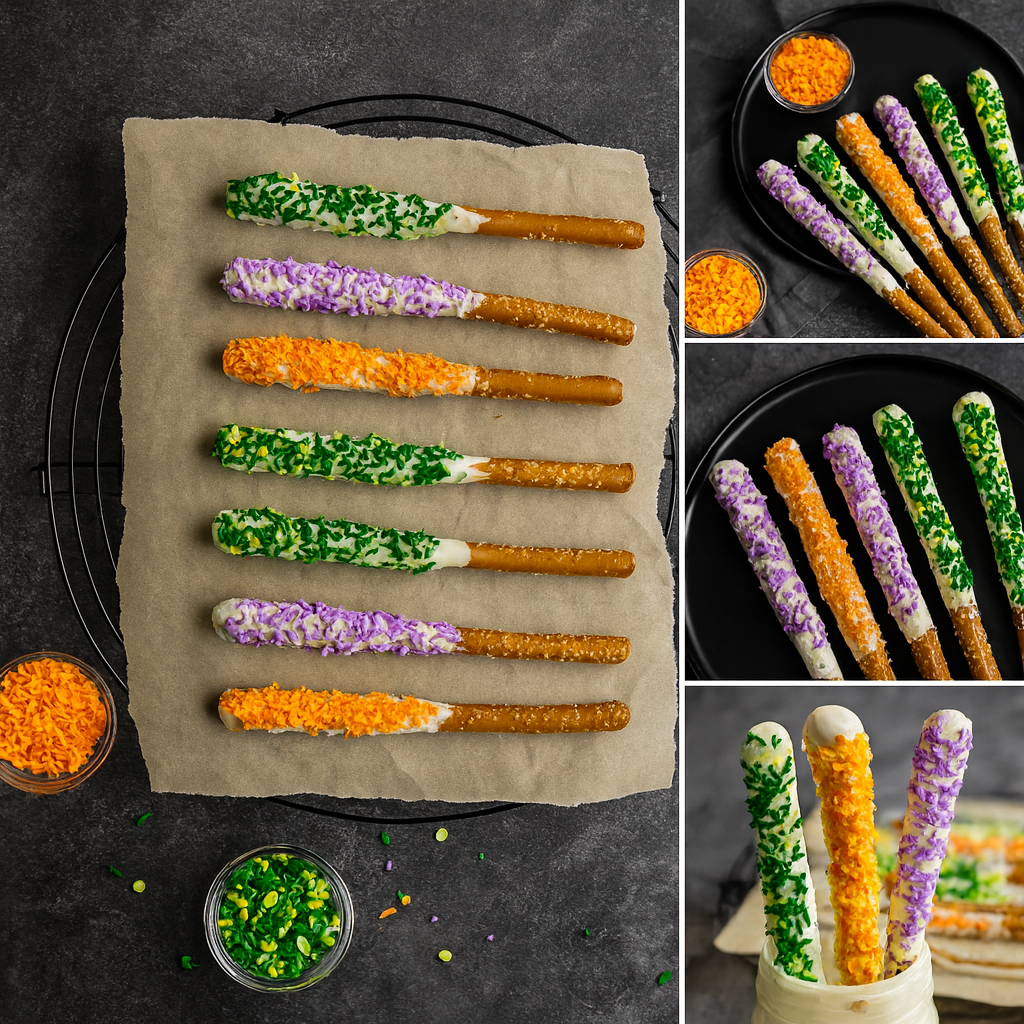
Dipping, Decorating, and Themed Designs
Once you have your melted chocolate ready, it’s time to dip, drizzle, and decorate. You get to decide how much of each rod to cover—go bold or keep it simple.
Coating Styles:
- Full Dip: Hold each pretzel and dip it ⅔ into chocolate. Gently tap off excess for a smooth finish.
- Half Dip: Dip half the rod for a two-tone effect—great for variety or mixing chocolate types.
- Drizzle: Use a spoon or piping bag to zigzag melted chocolate over rods without fully coating.
Tips for Even Coatings:
- Rotate rods in chocolate for full coverage.
- Let extra chocolate drip off, then gently run the rod against the bowl’s edge.
- Place dipped rods on parchment. If adding toppings, do it right away before the chocolate sets.
Halloween Designs and How-To’s:
Mummies: Dip rods in white chocolate. To make “wrapping,” drizzle lines across with a piping bag. Stick on edible eyes before chocolate hardens.
Monsters: Coat rods with colored melts (green, purple). Stick on candy eyes and draw silly faces with melted chocolate or edible markers.
Pumpkins: Use orange melts to coat rods. Pipe green lines for stems, then make faces with black or dark brown chocolate.
Spider Webs: Dip in dark chocolate. Using a piping bag, spiral white chocolate on top, then drag a toothpick from center outward to make “webs.”
Witches: Dip in green candy melts, then add a dark chocolate “hat” by piping a small triangle. Use candy eyes and licorice for hair.
Sprinkle Everything: For easy fun, just roll freshly dipped rods in colorful Halloween sprinkles or crushed candies.
Use what you have—quirky or classic, these rods are sure to stand out at any party.
Troubleshooting Tips for Perfect Pretzel Rods
Even the most experienced home bakers run into problems with chocolate-covered treats. Don’t worry—most issues are easy to fix.
Chocolate Consistency Problems:
- If chocolate’s too thick, stir in a teaspoon of coconut oil or vegetable shortening.
- If it gets grainy or clumpy, you may have overheated it. Try adding a bit more chocolate and stirring gently.
Cracked Pretzel Rods:
- Warm chocolate slightly to reduce snapping pressure when dipping.
- If rods break, use broken pieces for bite-sized treats—no waste.
Toppings Won’t Stick:
- Press toppings onto the rods immediately after dipping, while chocolate is wet.
- Avoid letting chocolate set before sprinkling.
Chocolate Sets Too Fast:
- If your kitchen is cold, the chocolate may harden before you add decorations.
- Dip and decorate one rod at a time for best results.
Mess-ups happen, but every batch is part of the fun. Need more dessert ideas for a cozy fall treat? Try the Butter Pecan Cookies Recipe for another sweet project that brings everyone together in the kitchen.
Serving, Storing, and Gifting Halloween Pretzel Rods
Halloween Pretzel Rods bring color and crunch to every fall celebration, but how you store, serve, and gift them is just as important as making them. These details help keep your treats fresh, make them look even better on display, and turn every batch into a shareable moment. Let’s make sure your pretzel rods deliver plenty of joy from the kitchen to the classroom and beyond.
How to Store and Serve for Maximum Freshness
Pretzel rods taste best with a crisp bite, so keeping them fresh is a top priority. Leaving them exposed can lead to soggy chocolate and a chewy texture—no one wants that. Proper storage also lets you make them ahead, which is a bonus for busy party planners and parents.
Best Practices for Freshness:
- Cool, Dry Place: Store decorated Halloween Pretzel Rods in an airtight container at room temperature. Keep away from direct sunlight or heat so chocolate coatings stay solid and colors don’t fade.
- Layering Trick: If stacking, use sheets of parchment or wax paper between layers to prevent sticking or smudging.
- No Fridge Needed: Avoid the refrigerator if possible. The fridge can cause chocolate to sweat (form condensation), which softens the pretzels.
Protecting Crunch:
- Always let chocolate set fully before storing.
- Seal containers tightly after every use.
- Eat within 1 to 2 weeks for peak freshness.
Fun Ways to Serve:
Bringing these treats to a party or event? Presentation ups the wow factor. Here are easy, crowd-pleasing serving ideas:
- Tall Jars or Glasses: Line up rods in clear mason jars, glass mugs, or vases for a colorful and inviting centerpiece.
- Halloween Mugs: Use themed mugs or small pails for a classroom snack display that doubles as decor.
- Trays or Boards: Arrange rods in rows or circles on a festive tray or snack board with other Halloween treats.
Perfect for Party or Classroom Snacks:
Halloween Pretzel Rods are portable, not too messy, and easy for little hands. Make a platter for the classroom Halloween party or let everyone pick their favorite design at your house party. For food allergy concerns, you can label flavors and toppings so everyone feels safe and included.
Creative Gifting and Presentation Ideas
A batch of Halloween Pretzel Rods can brighten anyone’s day, but creative packaging turns homemade treats into memorable gifts. Eye-catching presentation makes your rods pop in real life and on social media, whether you’re making teacher gifts, party favors, or looking to get noticed on Pinterest boards.
Show-Stopping Packaging Ideas:
- Cellophane Bags: Place one to three rods per bag, seal with a simple twist tie, and your treats are ready to gift. For extra flair, tie the bags with curly ribbons in orange, black, or purple.
- Decorative Ribbons and Twine: Wrap the bag’s neck with baker’s twine, raffia, or wide Halloween ribbon for a cozy, homemade look.
- Halloween Stickers or Tags: Add a themed sticker or a handwritten tag with a short message for that thoughtful finishing touch.
Tips for Visual Impact and Pinterest Appeal:
For photos, party tables, or pin boards, a little styling goes a long way.
- Lay decorated rods on a platter or parchment-lined baking sheet with Halloween confetti scattered around.
- Stand rods upright in mason jars or themed tumblers, grouping colors and designs together for contrast.
- Photograph against a plain white background or next to pumpkins and spooky decor for an eye-catching effect.
- Stack different themed rods—like pumpkins, ghosts, and monsters—in rows, making sure each style gets its moment.
Gift-Ready Ideas:
- Bundle rods with a mug and small packets of hot cocoa for the ultimate fall treat bag.
- Add rods to themed gift baskets along with other seasonal snacks or DIY goodies.
- Share a few as a simple “thinking of you” surprise for neighbors or coworkers.
With these tips, Halloween Pretzel Rods stay crunchy, look fantastic, and make every snack table or gift basket a little more festive. Your creativity in storage, serving, and gifting helps these treats stand out whether they’re passed around the classroom, sent home with friends, or showing off on your next social post.
Customization: Flavor Twists, Allergy-Friendly, and Fun Variations
Halloween Pretzel Rods thrive on personalization. Whether you’re mixing up scary designs, flavoring the chocolate, or working around allergies, the options make this snack a year-round favorite for creative families. This section will help you customize every batch with inclusive swaps and delightful flavor twists.
Allergy-Friendly and Special Diet Options: Guide on Safe Substitutions for Dietary Needs
Inclusive snacks make everyone feel welcome, which is key for classroom celebrations or sharing at larger gatherings. You don’t have to give up on eye-catching or tasty Halloween Pretzel Rods to fit dairy-free, nut-free, or gluten-free diets.
Dairy-Free Swaps:
- Use dairy-free dark, semi-sweet, or white chocolate chips (many brands are plant-based now).
- Coconut oil or plant-margarine gives melted chocolate a glossy finish without dairy.
- Vegan-friendly sprinkles and toppings keep things colorfully safe.
Nut-Free Choices:
- Select chocolate labeled nut-free, not just “may contain.”
- Avoid almond bark or any toppings with vague “may contain nuts” warnings.
- Stick to nut-free crackers, seeds (like pumpkin seeds), and allergen-friendly candy for toppings.
Gluten-Free Pretzel Rods:
- Most grocery stores stock gluten-free pretzel rods—many taste just like classic ones.
- Double-check candy melts and toppings for hidden gluten if cross-reactivity is a concern.
Tips for Allergy-Friendly Prep:
- Clean all tools and surfaces; even a crumb can spoil a safe batch.
- Keep allergy-friendly rods separate and label them clearly for buffet tables or gifting.
A few safe ingredient swaps transform Halloween Pretzel Rods into an inclusive treat, making sure no one has to sit out snack time.
Alternative Dipping Coatings and Seasonal Flavors
Dipping pretzel rods doesn’t have to stop at chocolate. There’s a world of possibilities waiting in your pantry to make each batch one-of-a-kind. Mix up flavors or add special Halloween twists for results that surprise and impress.
Alternative Dipping Coatings: Some fun coatings to try instead of, or alongside, traditional chocolate:
- Caramel melts for a sticky, sweet layer (quick tip: let caramel cool a little before dipping so it clings, not drips).
- Vanilla or strawberry yogurt coating, perfect for lighter, tangy flavor.
- Maple or butterscotch chips melted down for rich, buttery notes.
- White chocolate tinted with gel food colors for vibrant, custom shades.
Flavor Twists and Add-Ons: To fully embrace fall, experiment with these mix-and-match ideas:
- Stir pumpkin spice, cinnamon, or nutmeg into your melted chocolate or white chocolate before dipping.
- Crush peppermint candies for a lively, wintry crackle.
- Sprinkle crushed candy corn or coat rods in orange-and-black nonpareils for instant Halloween spirit.
- Add edible shimmer or glitter for a magical, not-so-scary touch.
Easy Halloween Add-Ons: For extra festive flair, top rods with:
- Mini marshmallows (for ghosty looks)
- Pretzel “broomsticks” made by twisting thinner pretzels at the base
- Gummy worms, spiders, or monster eyes to give each rod personality
Combining these creative coatings and flavors with classic Halloween Pretzel Rods lets everyone in on the fun, no matter their diet or taste preferences. Swap out ingredients, try seasonal spices, and decorate with personality—these treats truly let you play with your food.
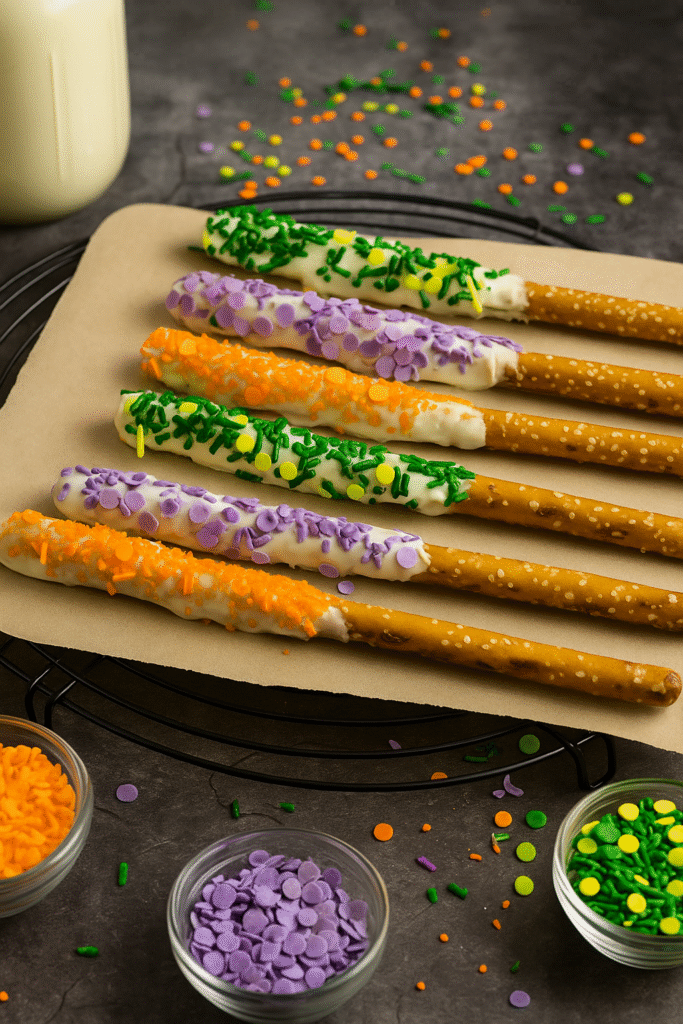
Halloween Pretzel Rods FAQs
Halloween Pretzel Rods stir up lots of questions, especially for families, classroom snack planners, or anyone making a big batch for the first time. From how long they last to how to keep them looking sharp, knowing the basics sets you up for crisp, colorful results with less fuss. Here’s a rundown of the top questions and friendly tips to help you confidently serve, store, and enjoy your spooky pretzel treats!
How Far Ahead Can I Make Halloween Pretzel Rods?
You can prepare Halloween pretzel rods up to 2 weeks in advance as long as they’re stored properly. Place them in an airtight container at room temperature, away from direct sunlight, heat, or moisture. The chocolate coating acts as a seal, helping the pretzels stay fresh and crunchy.
Can You Freeze Halloween Pretzel Rods?
Yes! These pretzel rods freeze well for up to 2 months. Arrange them in a single layer on a baking sheet to freeze, then transfer to freezer-safe bags or airtight containers. When ready to serve, thaw them in the refrigerator first, then bring to room temperature to prevent condensation from ruining the decorations.
What’s the Shelf Life of Halloween Pretzel Rods?
If stored in an airtight container at room temperature, they will stay fresh for 1–2 weeks. For maximum crispness, avoid storing them in humid areas or near the stove. If you live in a warm climate, consider refrigerating them in a sealed container.
How Do I Pack Them for School Lunches or Parties?
Individually wrap each pretzel rod in clear treat bags or plastic wrap to keep them fresh and prevent the decorations from rubbing off. Tie with Halloween-themed ribbons or twist ties for a festive touch. For parties, you can display them upright in jars or arrange them neatly on a themed platter.
What Are the Best Toppings for Halloween Pretzel Rods?
The most popular toppings include Halloween sprinkles, crushed chocolate cookies, colored sugars, edible candy eyes, and mini candies like M&M’s or Reese’s Pieces. For extra texture, you can also use shredded coconut (tinted orange or green), pretzel crumbs, or mini marshmallows.
Can I Use White Chocolate Chips for Dipping?
Yes, but they tend to be thicker than candy melts. Melt them gently in a microwave or double boiler, and stir in 1–2 teaspoons of coconut oil or shortening to achieve a smooth, glossy consistency. This makes dipping easier and helps the coating set evenly.
How Do I Keep Pretzel Rods from Breaking?
Use fresh, good-quality pretzel rods, and handle them gently during decorating. Avoid pressing toppings in too hard and lay them flat on parchment paper while the coating sets. If a rod does break, you can still dip the smaller piece for a mini pretzel treat.
Are Halloween Pretzel Rods Safe for Young Kids to Help Make?
Yes, but supervision is important. Adults should handle melting and hot chocolate, while kids can have fun dipping cooled rods and adding decorations. This makes it a safe, hands-on Halloween activity for families.
What’s the Easiest Way to Clean Up?
Before starting, line your workspace with parchment or wax paper to catch drips. Use disposable piping bags or plastic sandwich bags for decorative drizzles to reduce mess. Rinse chocolate-covered tools immediately in warm water before the chocolate hardens, making cleanup quick and easy.
Conclusion
Halloween Pretzel Rods capture everything that makes Halloween treats special—eye-catching colors, sweet and salty flavor, and plenty of room for personal touches. They’re simple to make, easy to customize, and perfect for sharing with friends, family, or classmates. Get creative with toppings, colors, and designs to make each batch your own.
Whether you’re making them for a party or handing them out as gifts, these festive snacks always invite a smile. Try your favorite flavor twists, show off your best monster faces, and don’t forget to snap a photo before they’re gone. Let us know your most popular designs or tips by sharing a comment below, it’s always fun to see how everyone brings their Halloween Pretzel Rods to life. Thanks for joining in and making this holiday even sweeter!

